
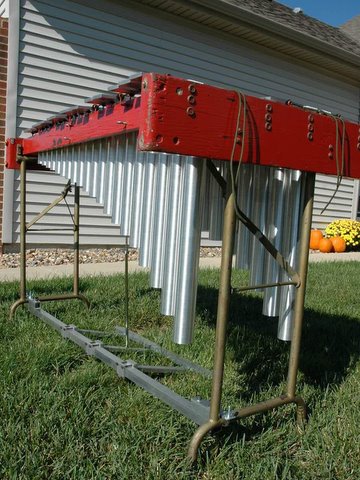
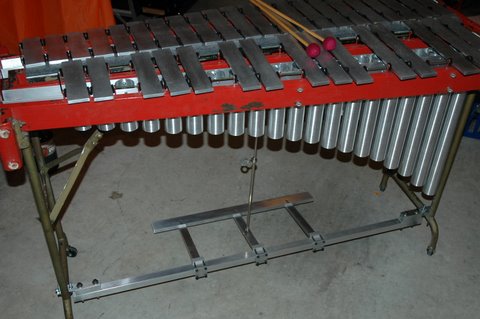
This was a challenging and fun project. I refurbished this vibraphone for a local musician, who received it as a gift from a friend. To honor the friend, who unfortunately had died recently, the owner wanted to restore the instrument to working order. He affectionately called this special instrument "The Red Vibes". They were manufactured by Jenco, a now defunct company based in Decatur, IL, about 35 miles southwest of Champaign.
The owner wished to get the instrument to be playable but maintain its condition as it was gifted to him. It included a frame, bars, and a damper bar, but was missing a damper pedal and resonators. The damper pedal allows the player to control how long the bars ring after being struck, and without it, the instrument is unusable. Resonators make the instrument sound louder and more full. You can play a vibraphone without resonators, but it’s a bit like playing an electric guitar with no amplifier. But if he wanted resonators, they would either need to be sourced or be built from scratch.
Probably the most common vibraphone, at least in the US, is the Musser M55. From elementary schools to football fields, to jazz clubs and professional stages, they’re everywhere, and have been a kind of “standard” for decades. The “Red Vibes” are not that. Jenco made instruments aimed at education and hobbyists, a noble pursuit for sure, but their instruments are not nearly as common today, and maybe haven’t aged as well. Jenco being out of business doesn’t help either. This meant finding parts would be hard.
Bars
Let’s start with the simple part, and one that was intact: The bars. Vibraphone bars are aluminum. These bars had some oxidation, corrosion, and pitting, but nothing severe, and they could be cleaned up without removing any essence of the instrument’s history. It was important to do so to prevent accelerated deterioration. I cleaned them using Scotch Brite and Acetone. Small pits were filed or sanded out. I took special care to not remove too much material or mar the bars. This is especially important because keyboard bars are tuned by carefully removing material from specific areas of the bar. If I removed metal, it could change the pitch of the bar. They were pretty well in tune, so I did not want to mess them up.
I cleaned the keys using Scotch-Brite, steel wool and acetone.
Damping System
Damping pedal sketches and designs
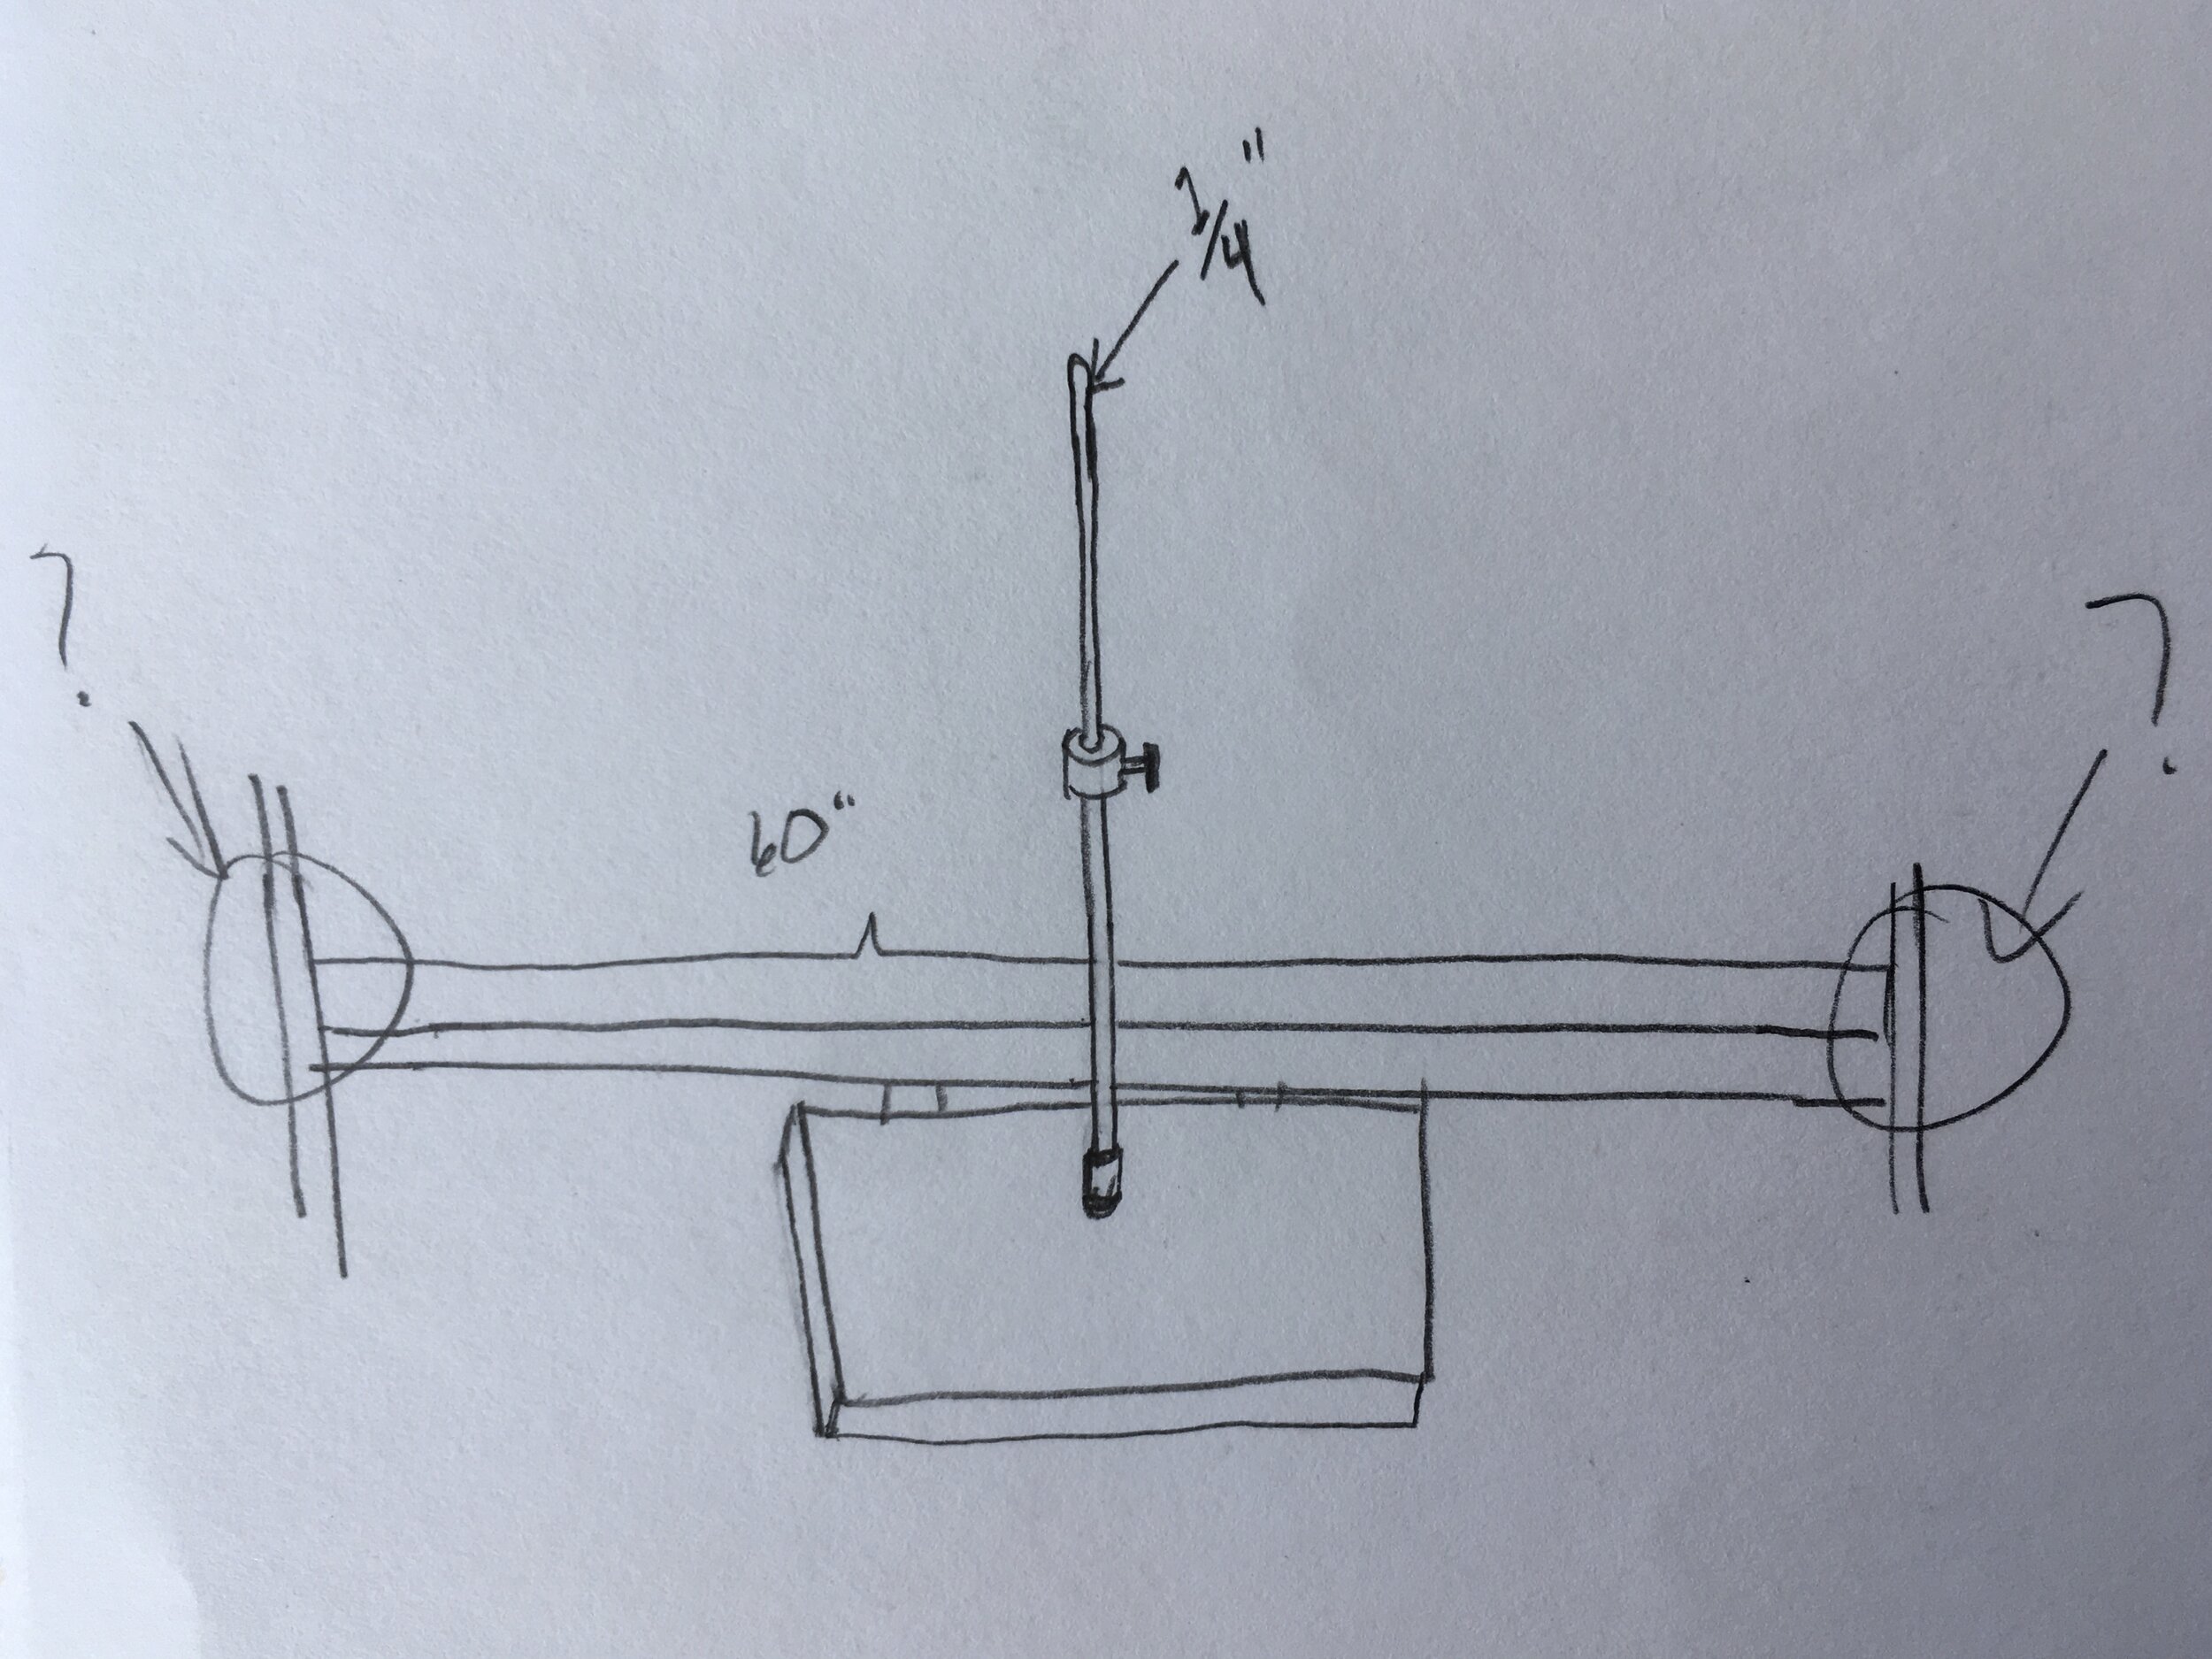
The damping system of a vibraphone includes a damper bar with a thick felt strip, which presses on the bottom of the bars to stop them vibrating, a pedal, which the player steps on to disengage the damper bar, and a connecting rod, which connects the two. The damper bar needed new felt, and the pedal and half of the connecting rod were missing.
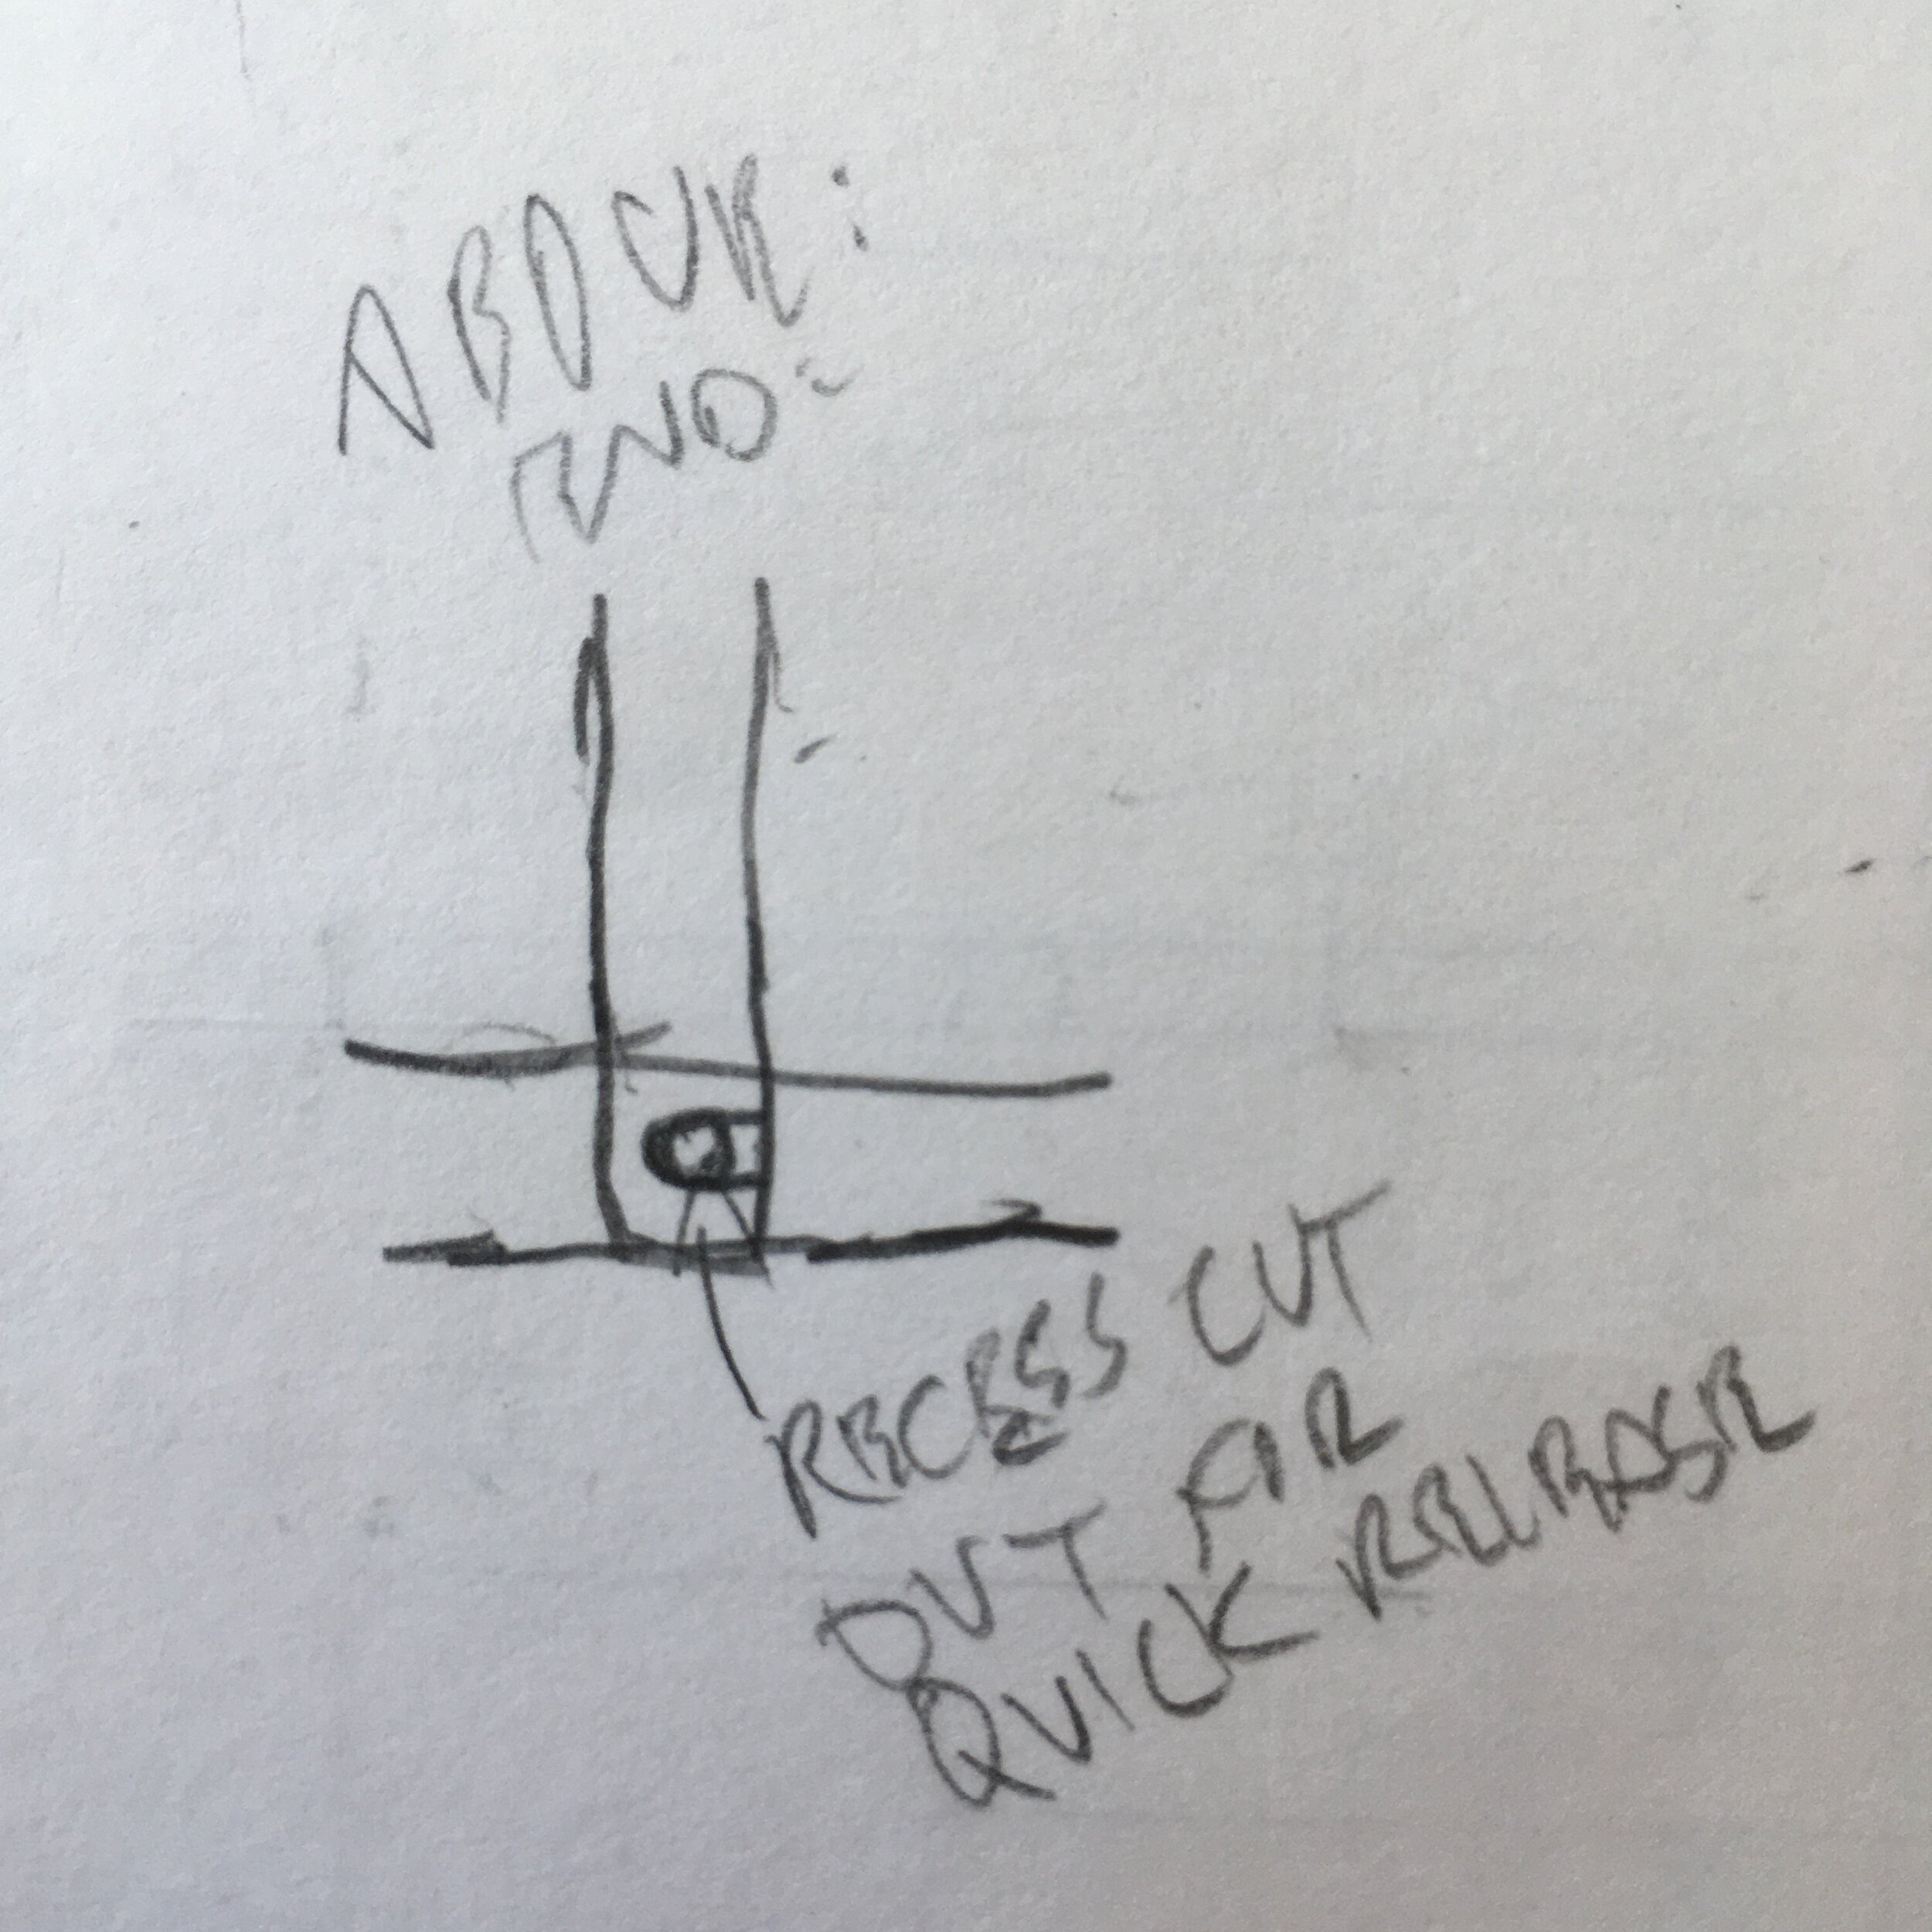
Sketch of Musser M55 pedal features
There are several different types of pedals on vibraphones. Some have a narrow pedal that articulates left and right to allow the player to continuously reach it as they move up and down the keyboard. On some vibraphones, the pedal doesn’t move, but is wide, running much of the length of the instrument for easy access while playing through whole range of instrument.
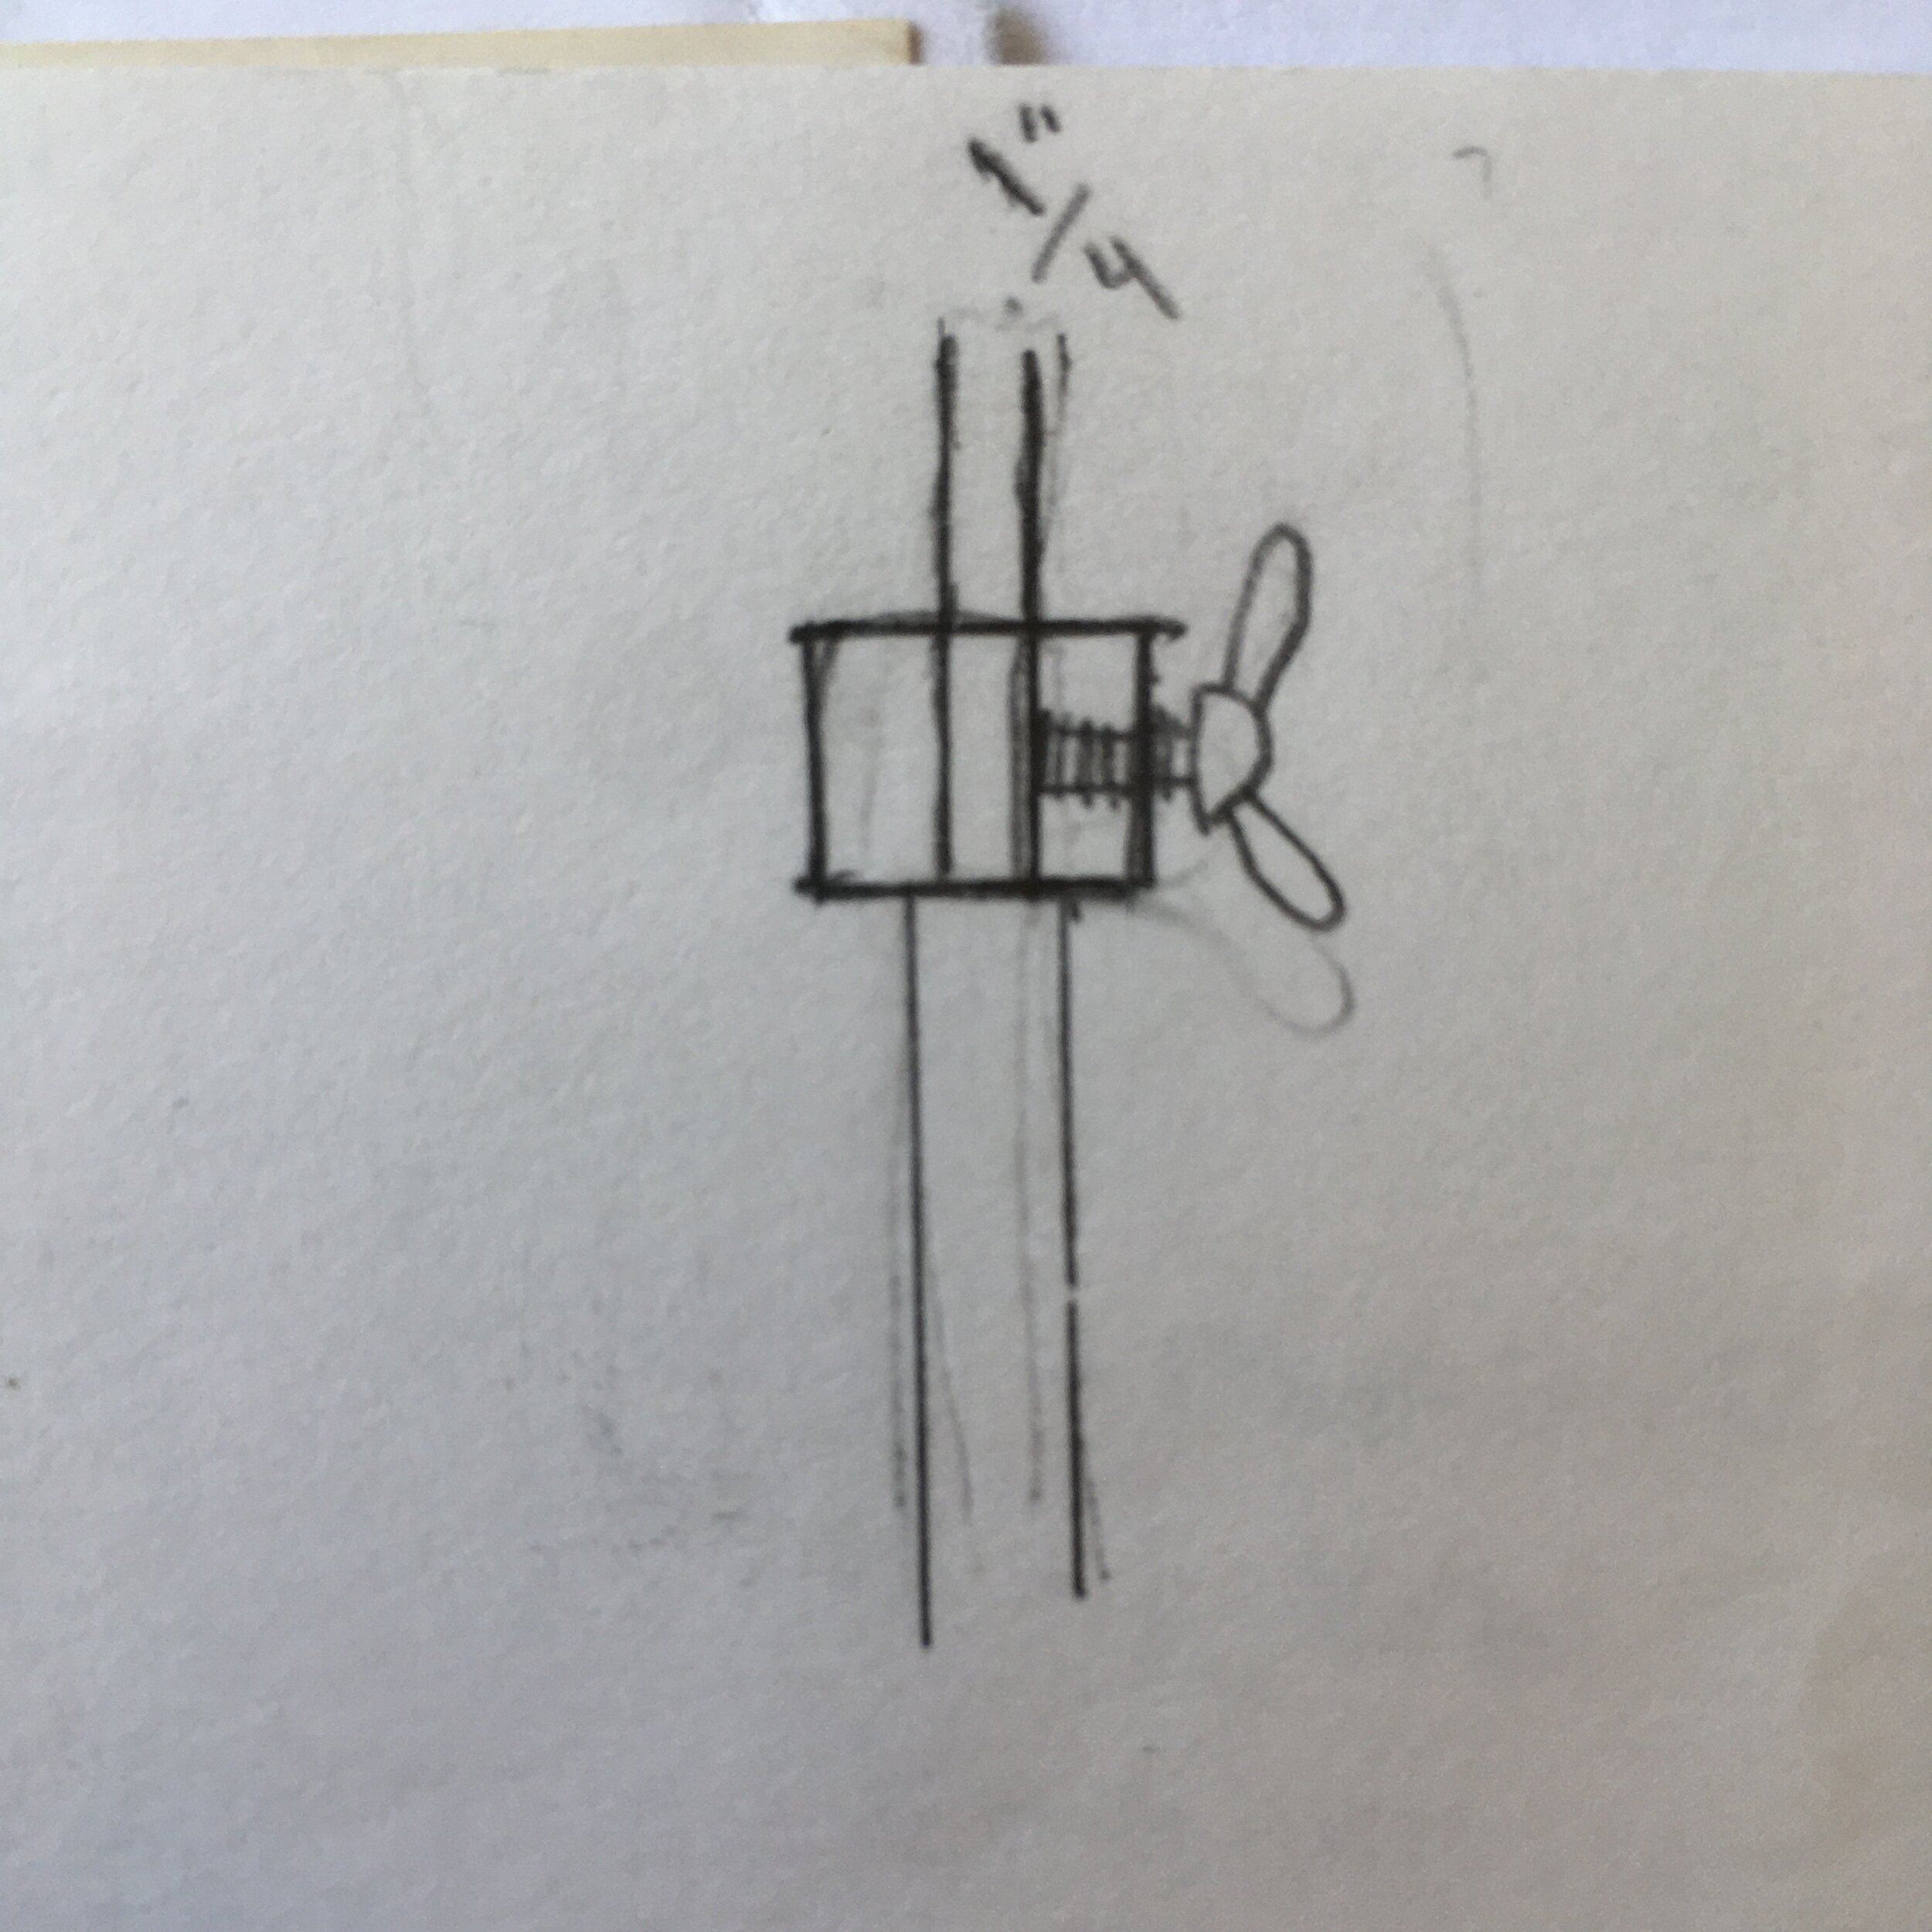
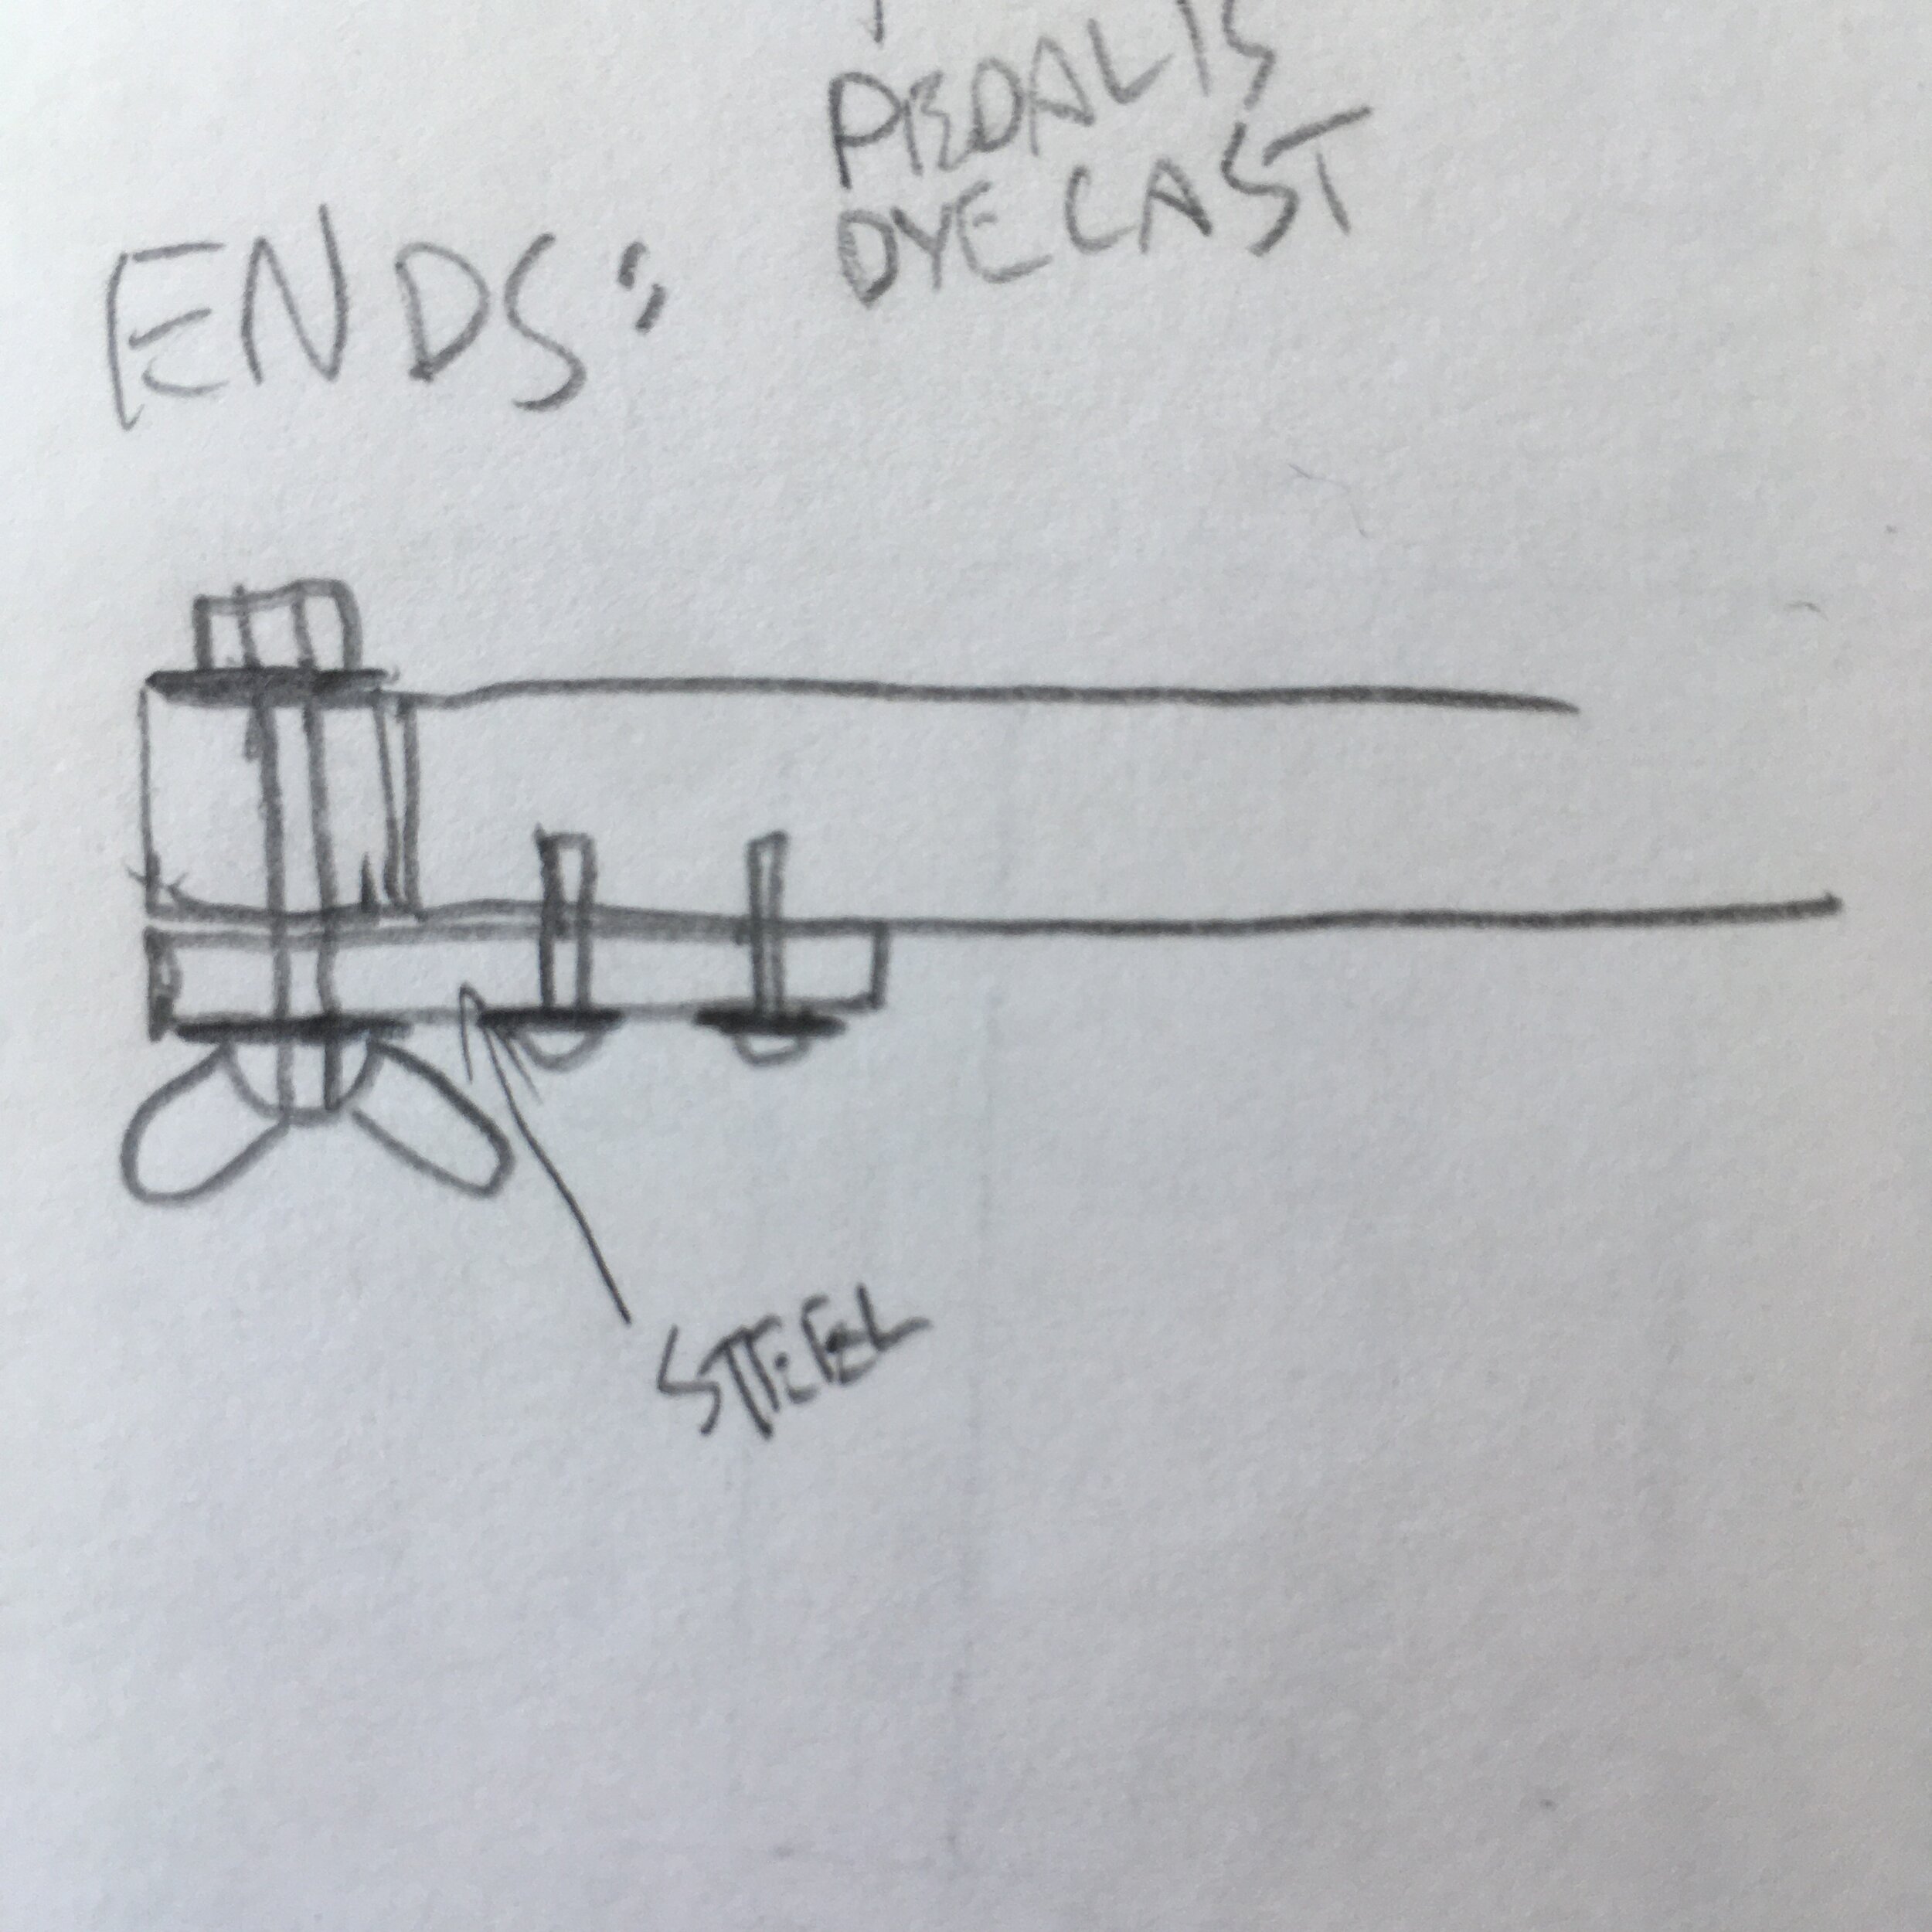
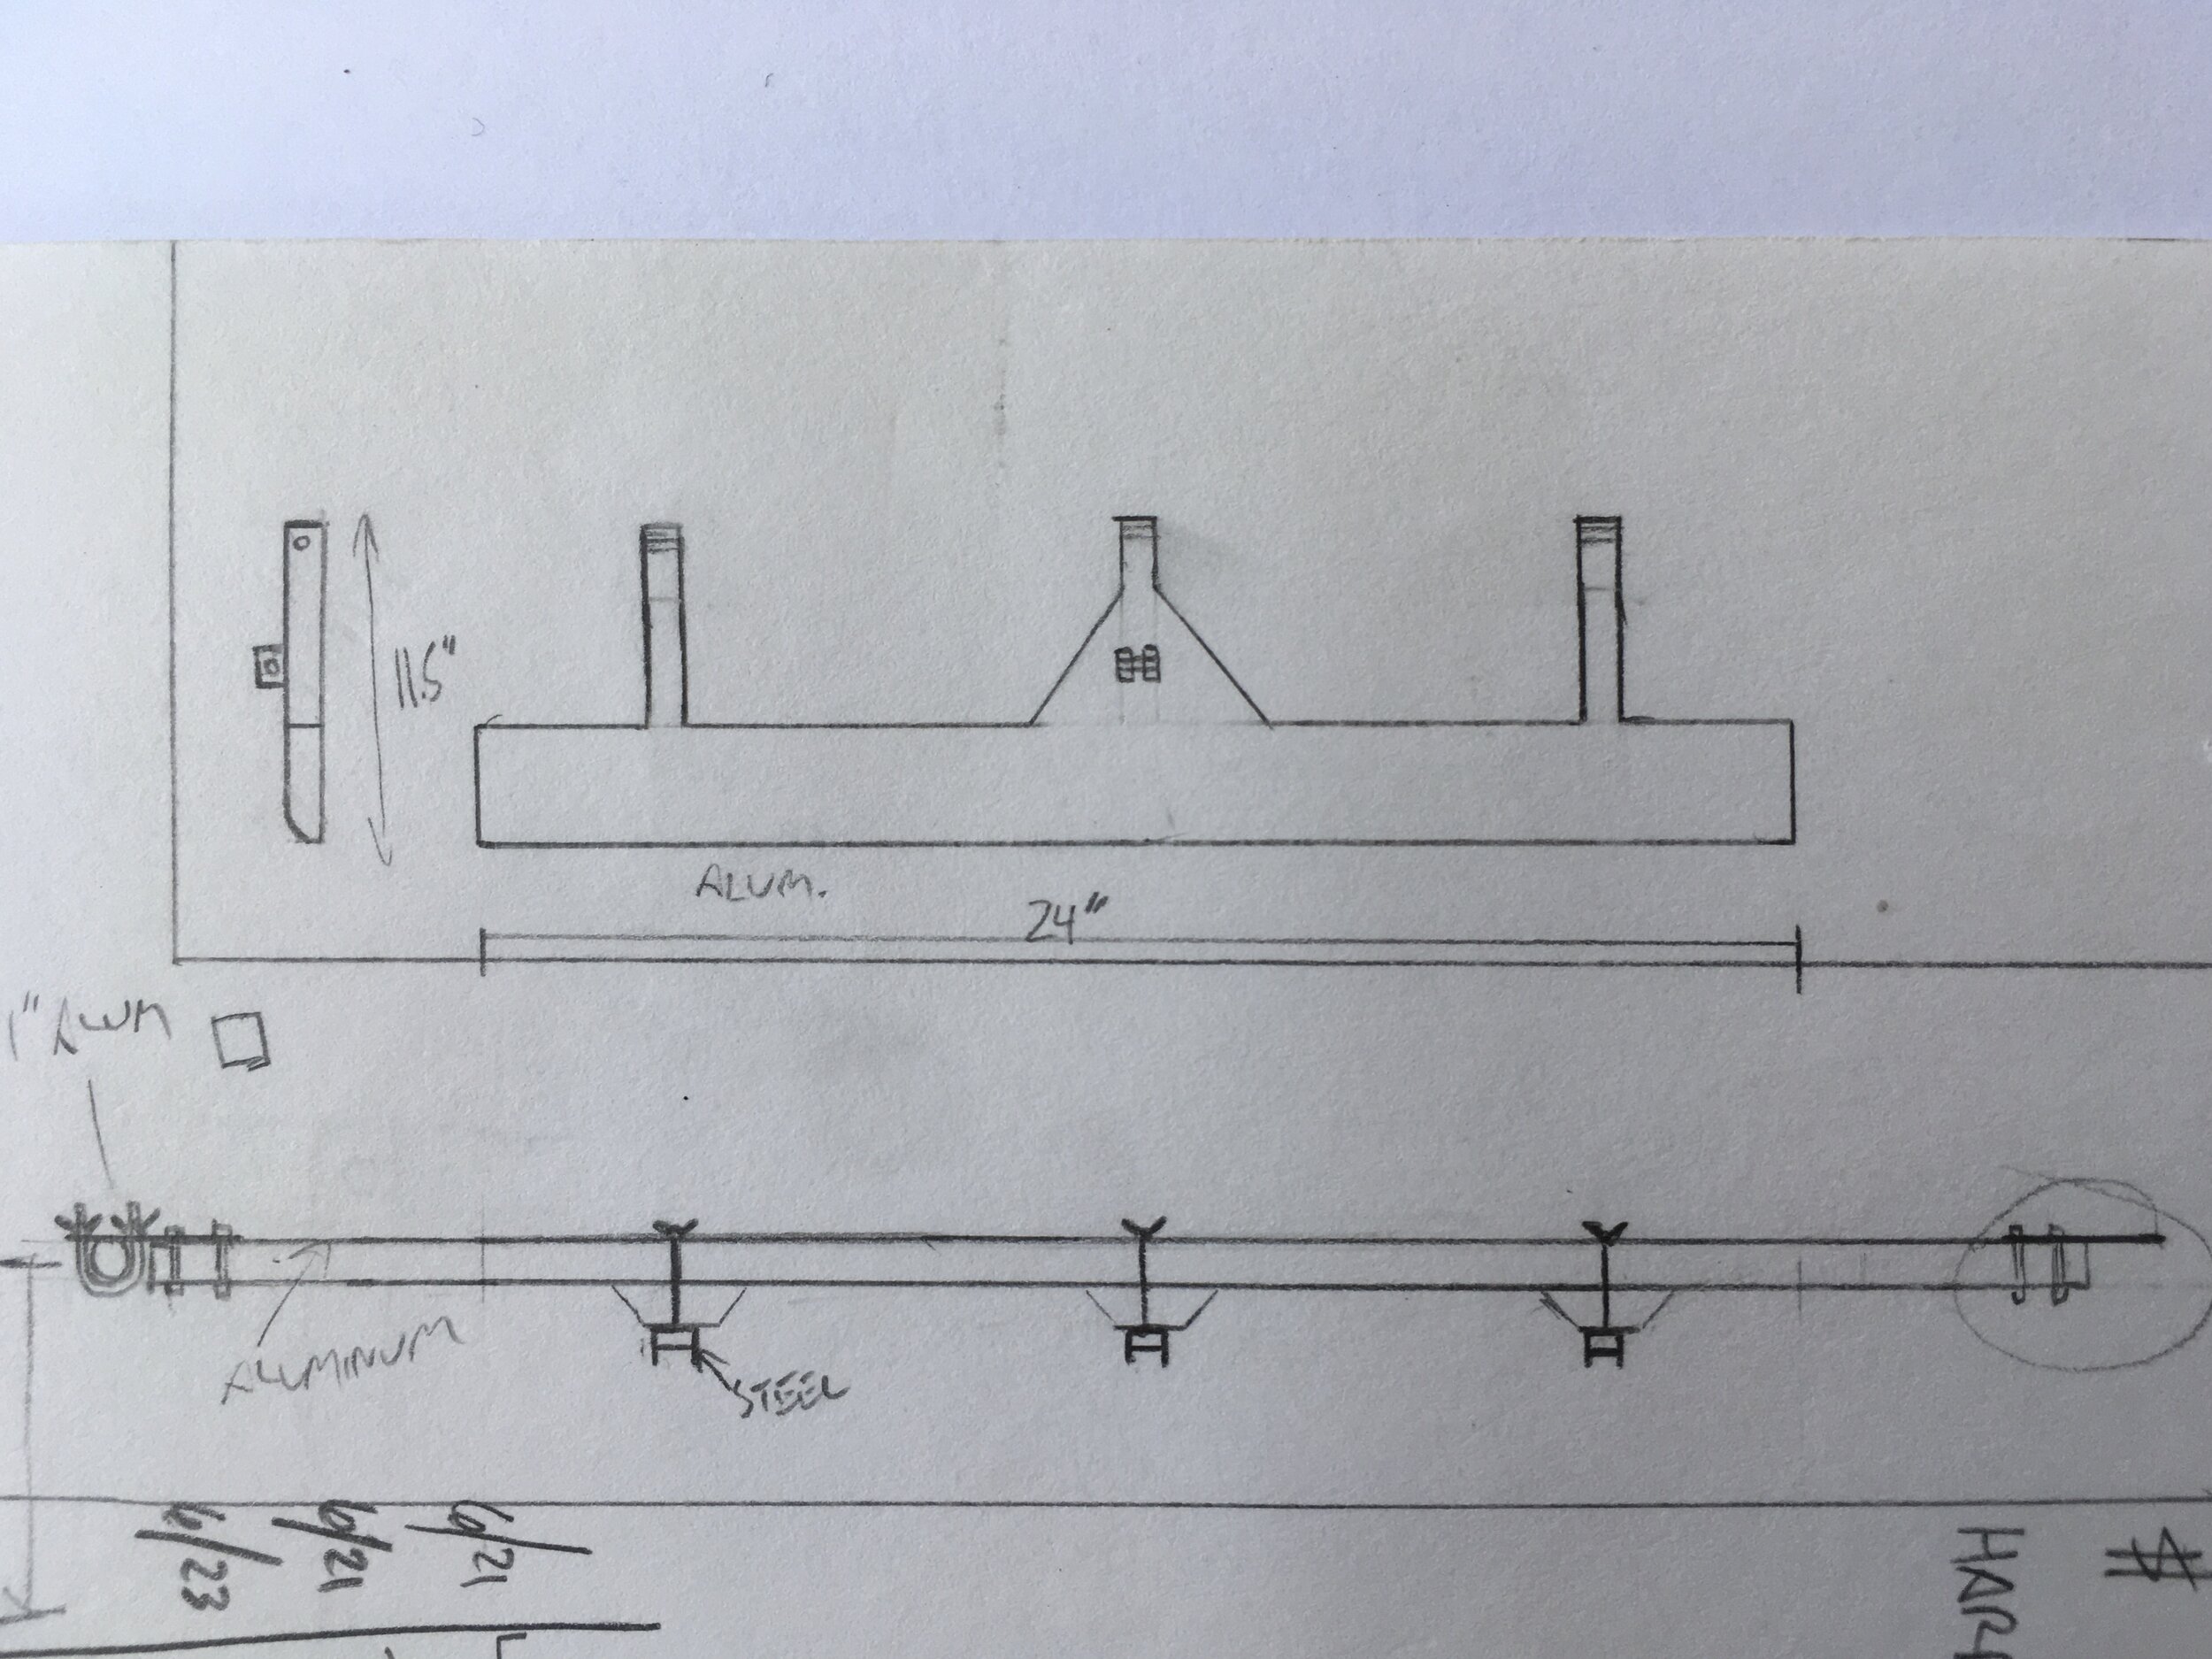
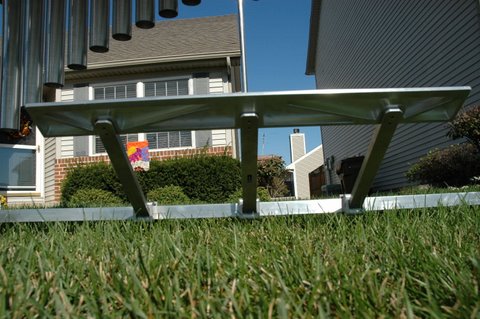
I searched far and wide for an original Jenco replacement pedal for this instrument but came up empty. So, I designed and built a new pedal. I decided on wide damper pedal, because I have a feeling the original was a wide pedal, probably made of the same steel tubing as the legs of the frame. This is fairly common in other instruments.
But rather than steel tubing, I decided to use aluminum. I guess I thought machining aluminum would be easier then bending and pressing tubing. Or at least more precise. The tradeoff is that the aluminum is bulkier and thus heavier than steel tubing, but the owner didn’t plan to take this instrument out for gigs, so that wasn’t a huge concern. In fact, the instrument was a bit top heavy, so more mass near the ground would lower the center of gravity and make it feel sturdier. The pedal would mate to the existing damper bar hardware and attach quickly and easily to the crossbars of the frame.
The machining was completed at Wagner Machine Co. in Champaign, IL.
PARTS: Felt strip, aluminum stock: Solid, square, flat, bolts
TOOLS:
RESONATORS
Like I said earlier, you can play a vibraphone without resonators, but it’s not very loud, and not as much fun! Also, vibraphone resonators are the part that make the instrument’s signature “vibrating” sound. Most vibraphone resonators have fans which rotate to open and close the top of the tube. This causes a tremolo, a musical effect consisting of smooth increases and decreases in loudness. The fans are fixed on a rotating rod driven by an electrical motor, and the speed of the rotation/tremolo is determined by a potentiometer knob.
The approach to resonators evolved as this project went on. Originally, the owner thought this would be a practice instrument and resonators wouldn’t be needed. But as I got deep in to building the damper pedal, we decided resonators would be nice. Building a working fan mechanism would be a huge challenge, so I decided that if I couldn’t source original Jenco resonators, I’d make some, but without rotating fans. I couldn’t, so that’s what I did.
Resonator sketches
Because the resonators are part of the sound-producing system of this instrument, designing and building them was particularly challenging. They needed to work with the existing frame and be easy to assemble/disassemble, in addition to making the instrument sound better.
The operating principle of resonators in keyboard instruments is that when a vibrating bar is situated near the end of a tube of equal fundamental frequency (f0), the column of air in the tube will vibrate sympathetically. Because the bar and tube resonate sympathetically at f0, but have different resonances at the harmonics (fn), f0 is amplified more than the higher harmonics. This means that the loudness of f0 is greater than the loudness of fn, making the instrument sound “darker” or “more mellow”. There may be matching of higher harmonics between the resonator and bar, but the main amplification is at f0. This is how the timbre, or characteristic sound of the vibraphone is made, and what I sought to achieve in my design.
Tube length calculations - Notice that wavelength has an inverse relationship to frequency/pitch.
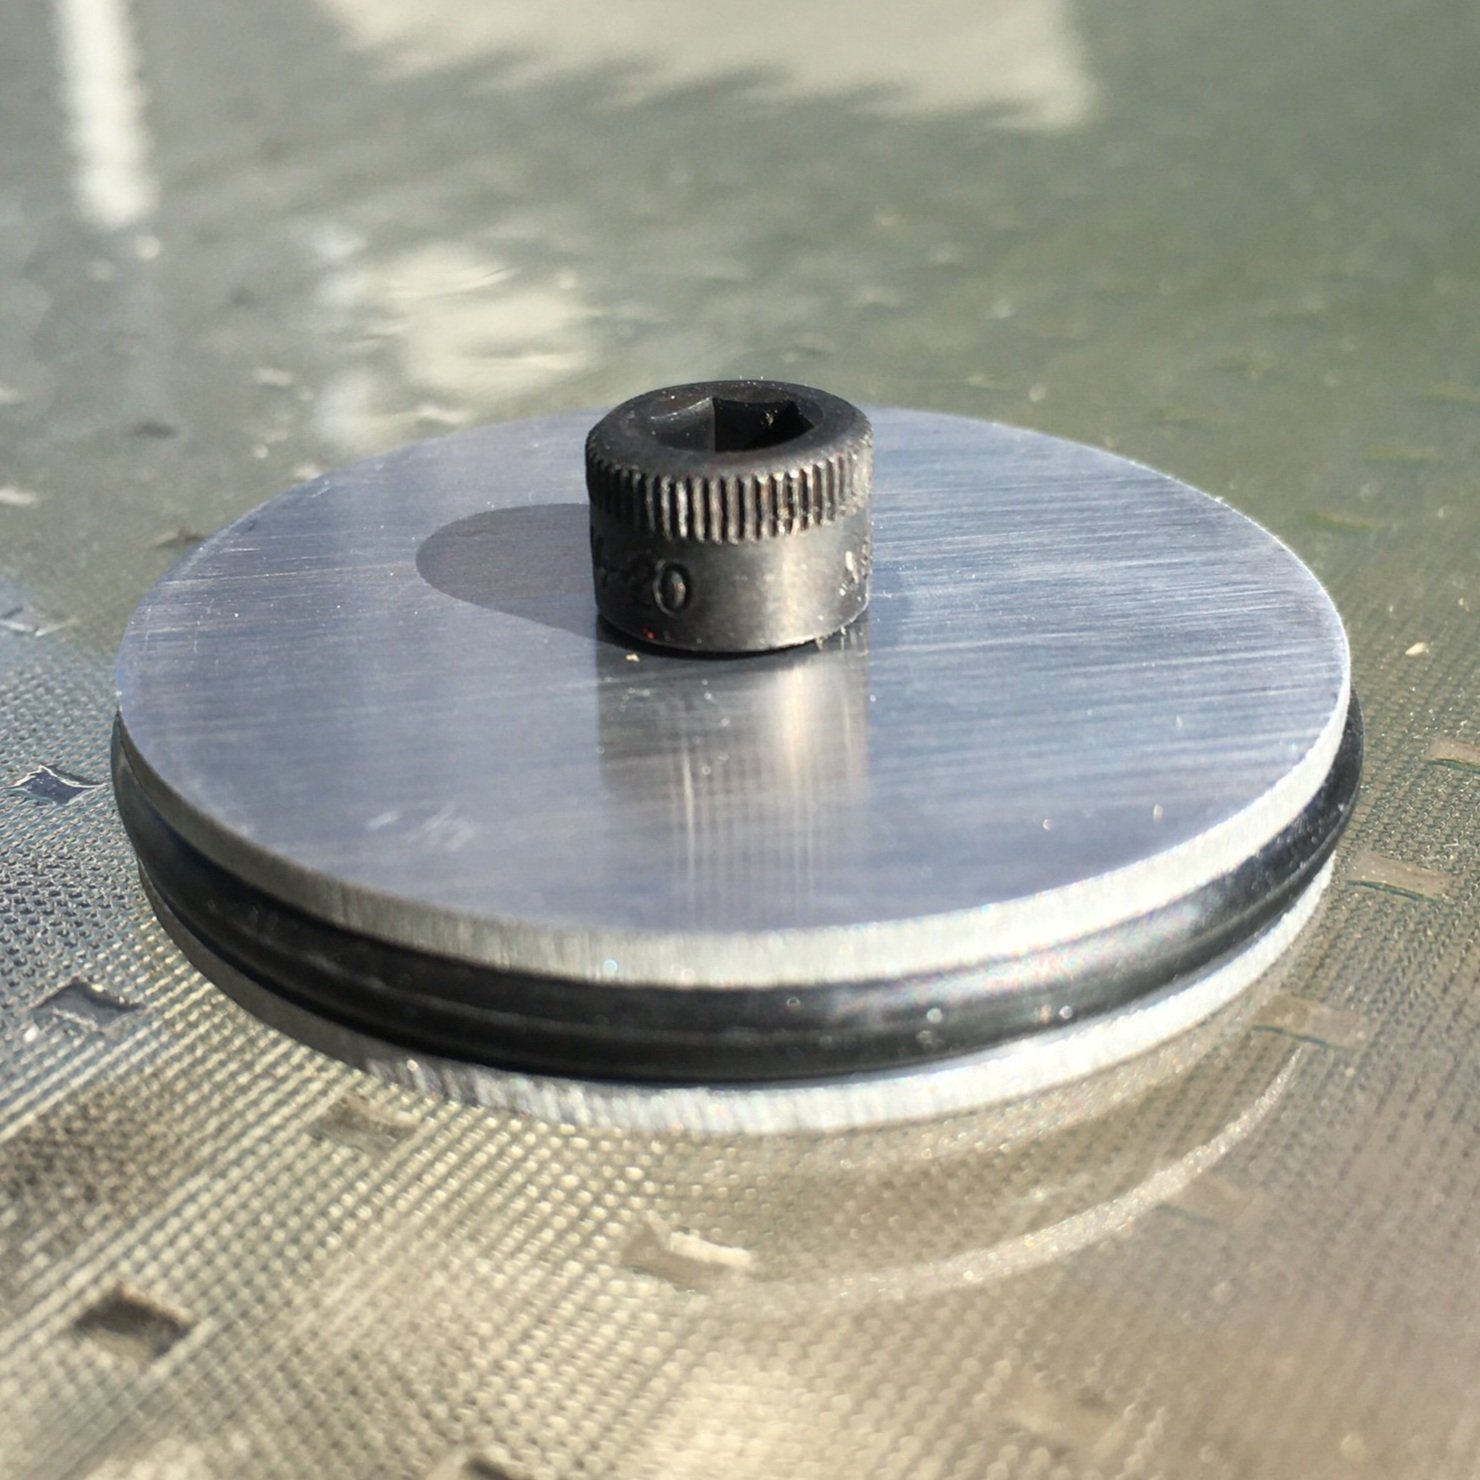
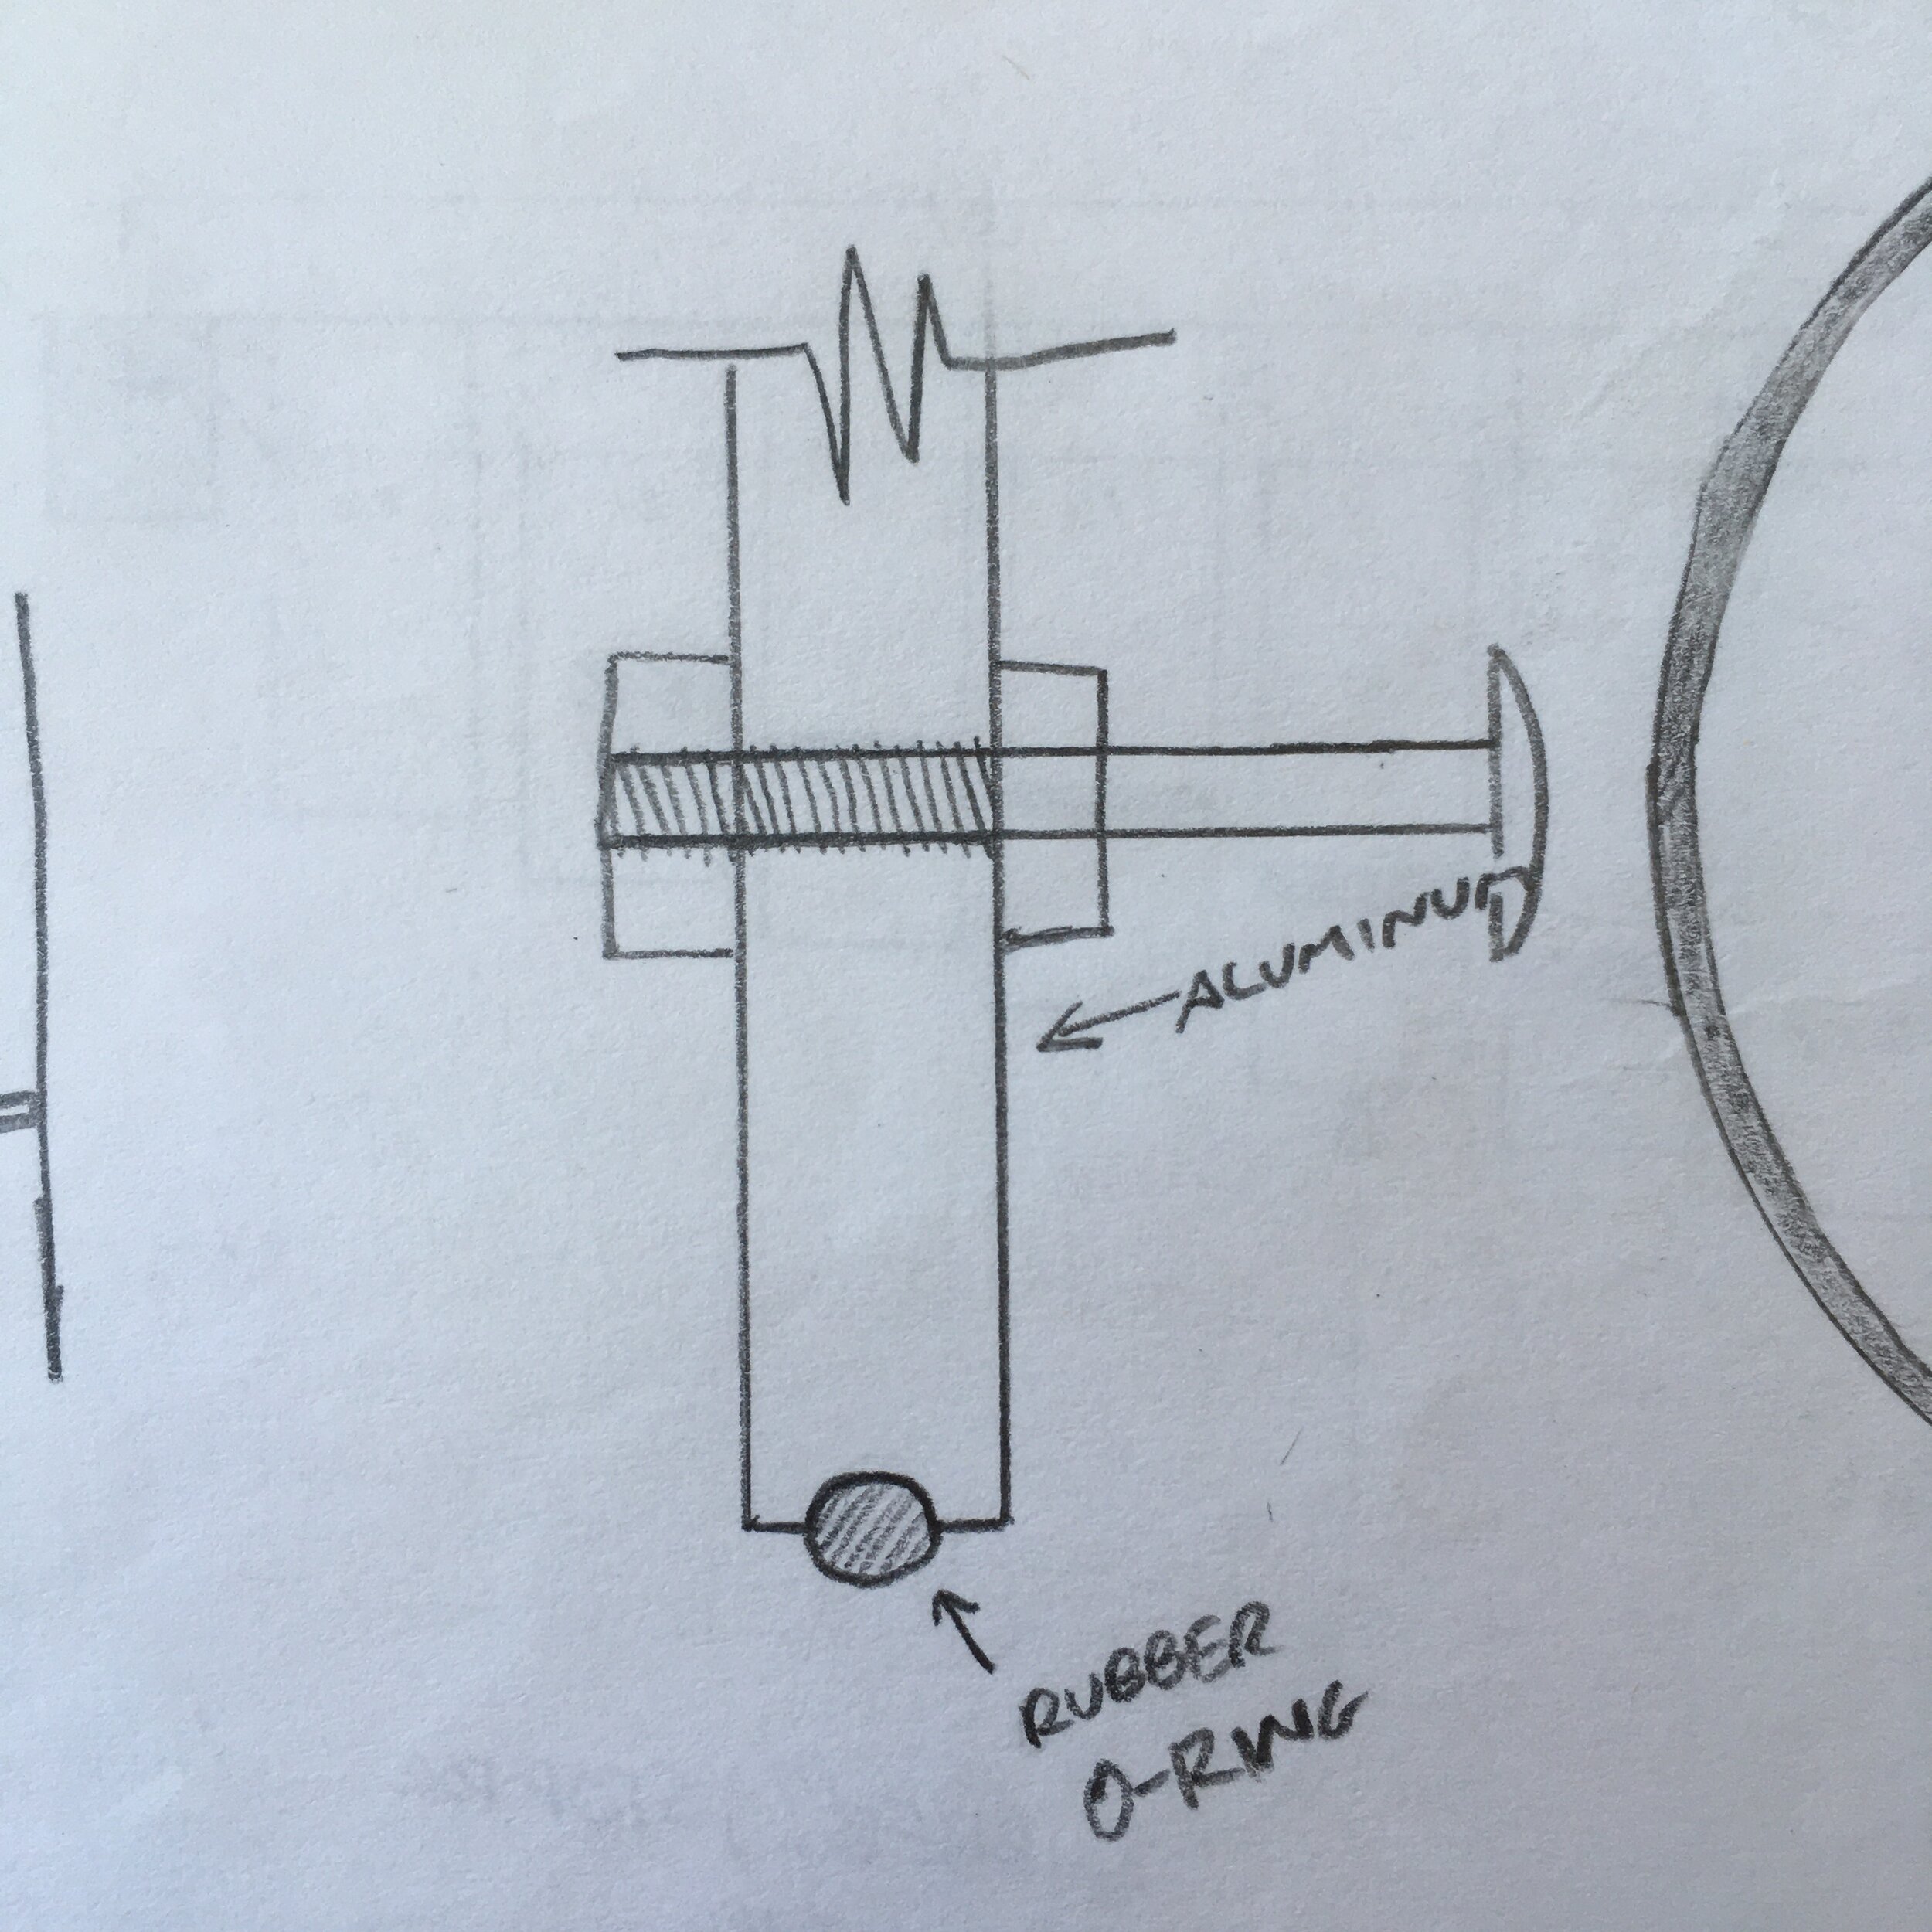
Dimensions – 1/4 wavelength one-end-open, one-end-closed (half open) aluminum tubes, 1 3/4″ outer diameter (equal to the bar width).
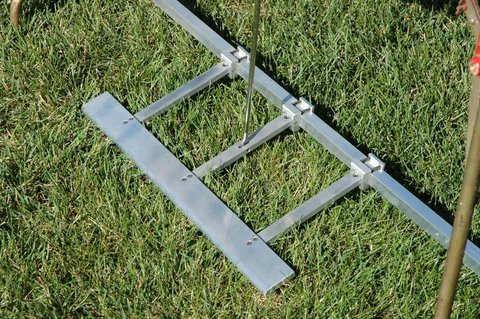
Tunable – Tube stops made with aluminum discs with rubber o-ring as a seal (similar to a piston in a combustion engine). Each tube stop has a 1/4″ hex bolt through it, allowing each resonator to be tuned individually with a hex wrench.
End Correction – Gap between bar and tube provides end correction for 1/2 open tube resonators. This ensures the vibrating bar is at the anti-node of the wave, which is slightly (about 1/2″) outside the open end of the tube.
Finish- I investigated several finish options, (anodizing, lacquer, etc.), but decided a “brushed” finish would be best (least expensive and coolest looking).
U-Channel aluminum was used for the end piece on each resonator set. The original instrument included a small metal bracket with a raised knob in the middle. The U-Channel end piece has a hole into which the knob fits, holding the resonators in place.
Initially, I cut each resonator tube a little long to give myself some wiggle room. After the tube end-stops were put in place and the resonators tuned, I made the curve of the tubes smoother, just for aesthetics.
Resonator rail sketch
Wagner was also the site of drilling the holes for the resonator tubes and rails. The tubes were cut using a plumbing pipe cutter. The brushed finish was achieved using sandpaper, steel wool and Scotch-Brite with the tube spinning on a metal lathe. The tubes are attached to the rails by round head hex bolts and nylon-insert lock nuts.
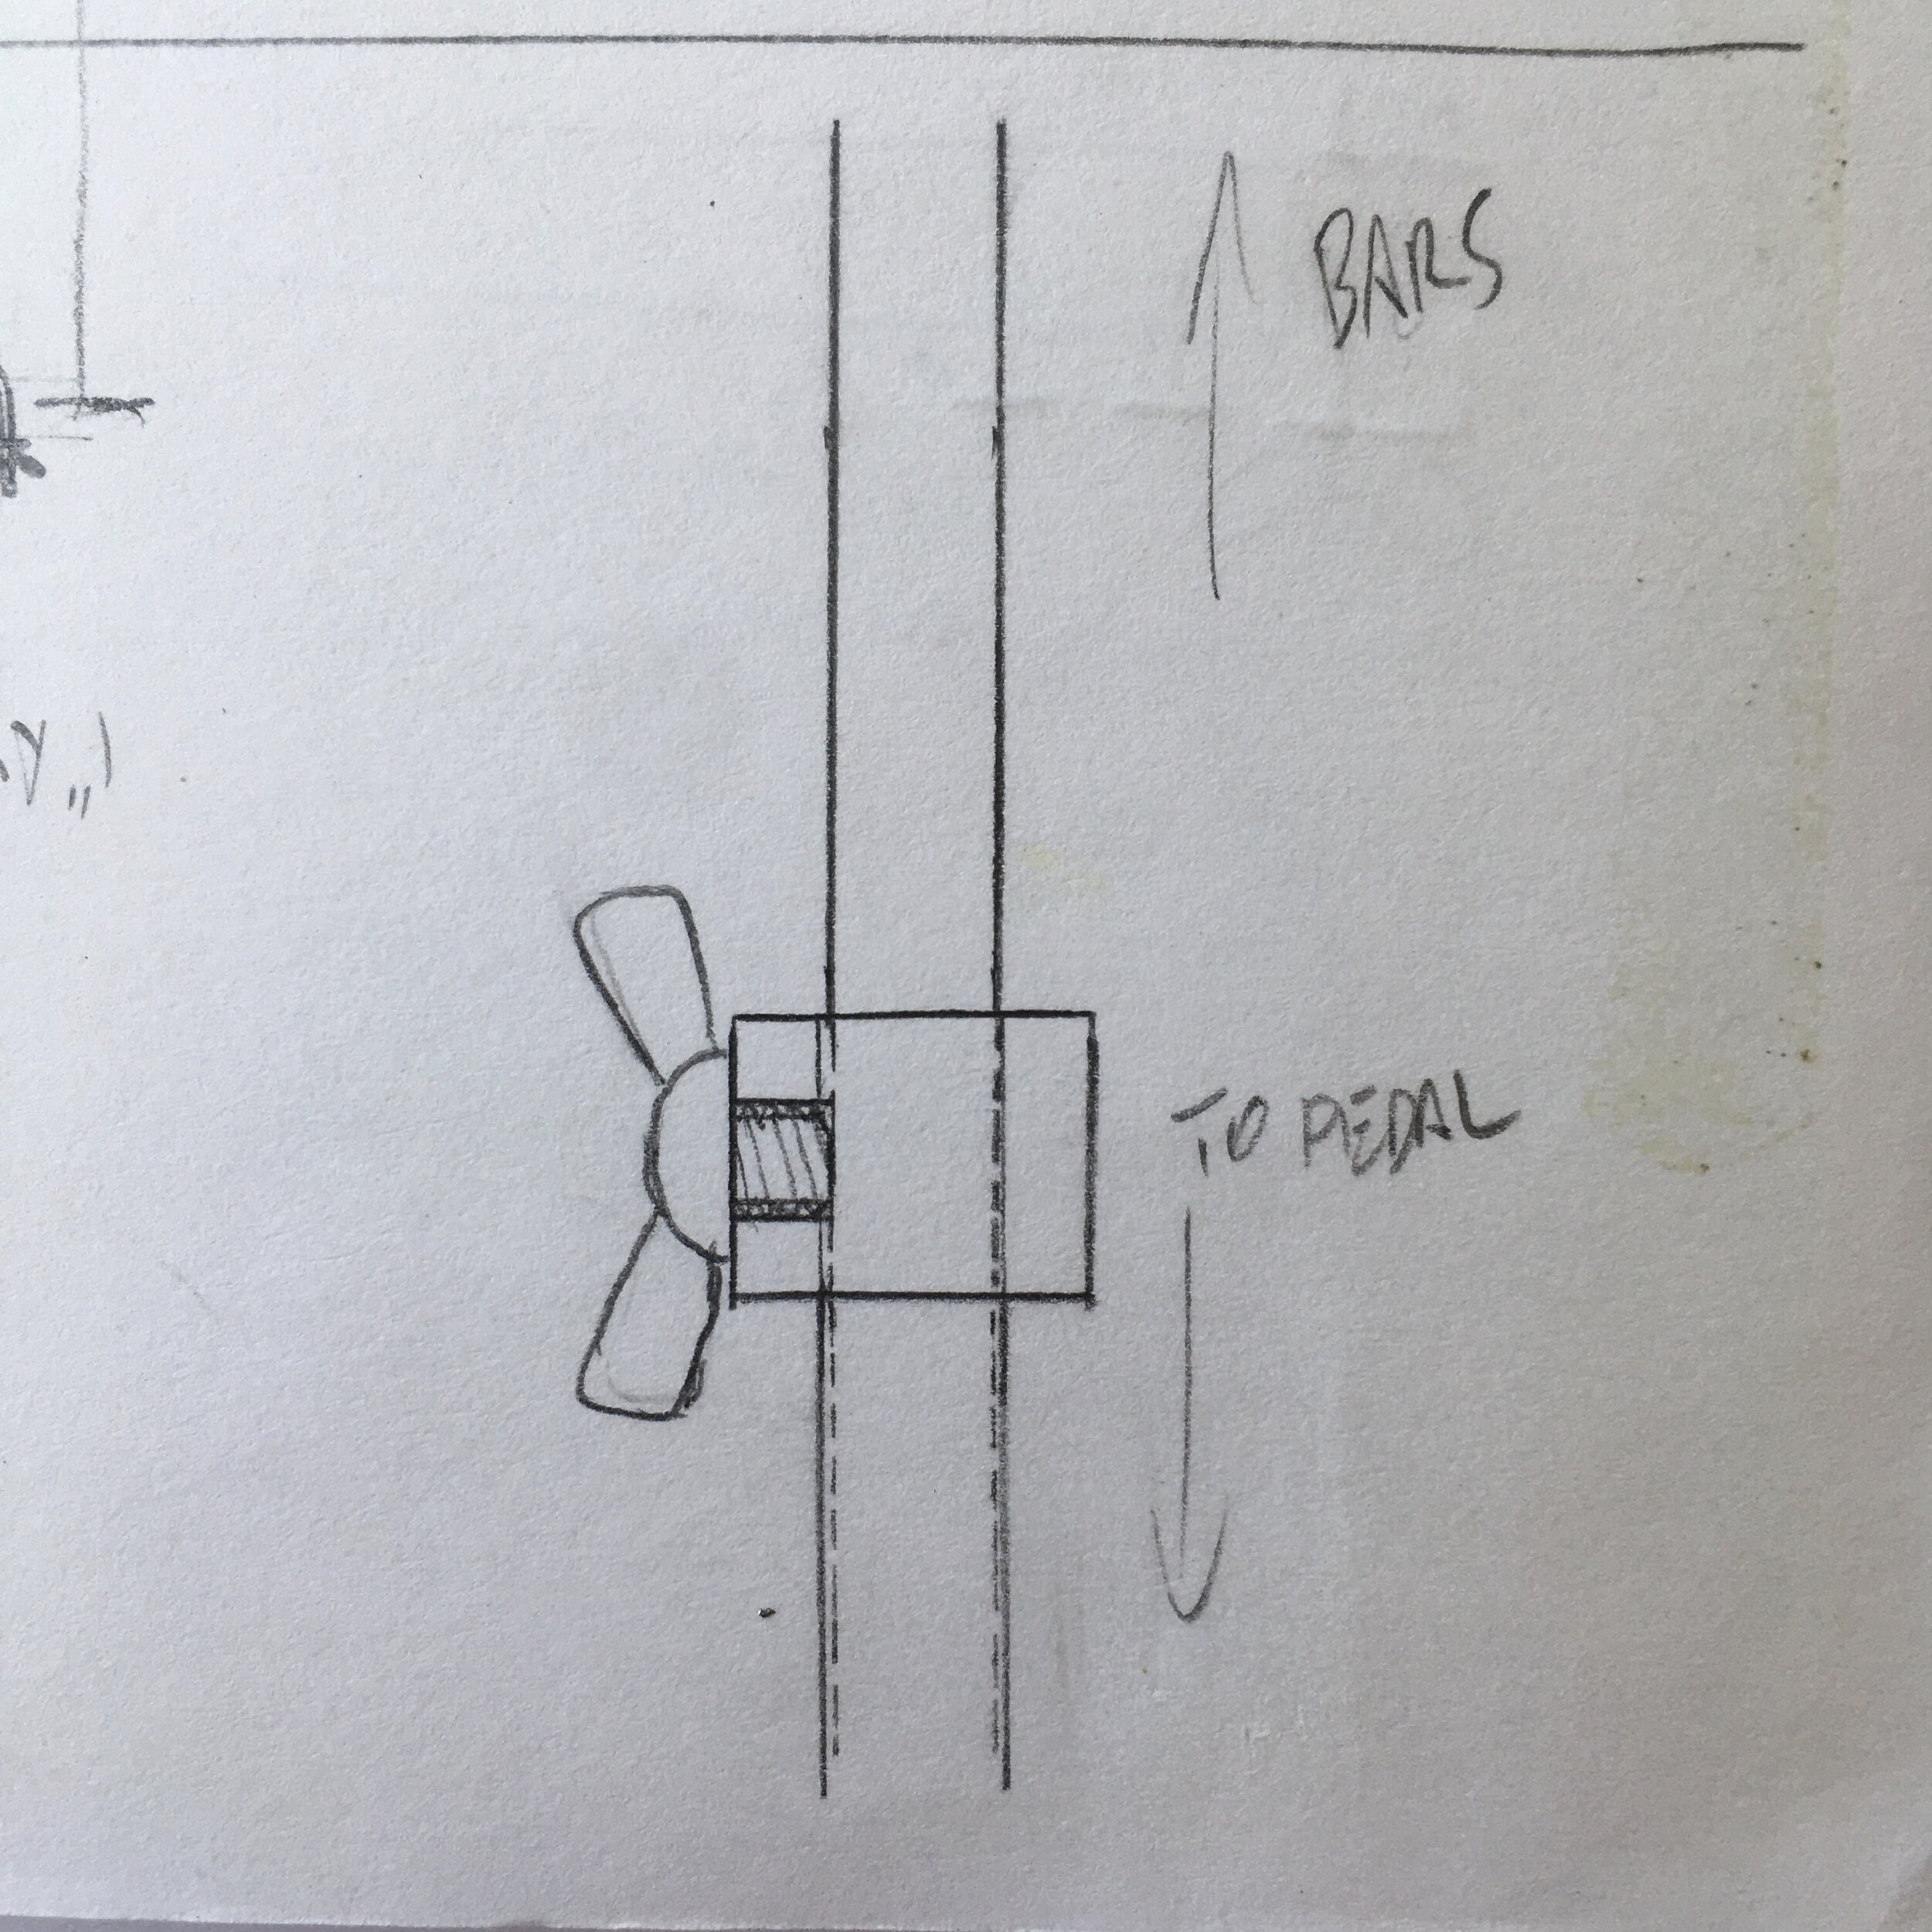
Note that significant mass has been removed from the pedal to keep the action lighter. The spring which counteracts the weight of the pedal is calibrated to the pedal, and in this case, is probably sized for a pedal that is somewhat lighter.
FRAME and bar suspension
I would leave the signature red paint intact. It was a coat of paint over at least a couple other colors, but its cracks, scratches, and dings recorded a history that was important to its owner and his friend. So it stayed. I also gently cleaned the steel tubing with dish soap and water and lubricated the wheels and metal-on-metal moving parts in the frame with three-in-one oil.
The bars of percussion keyboard instruments are suspended by cord running through holes at their nodes, which is where the bar is vibrating the least. In a simple idiophone like a vibraphone bar, the node is actually the axis around which the bar is wiggling up and down at its fundamental frequency, or pitch. So, the bars have a hole drilled right through it, perpendicular to the length of the bar. The cord runs through eye screws which are screwed in to the wooden frame, and there are rubber grommets in the eye holes to keep the bars from vibrating metal-on-metal with the eye screws. These grommets were dry, cracked, or missing, so I removed them and used felt washers between the bars and the eye screws, at the suggestion of Gilberto Cerna. Lastly, the tension of the cord is maintained by springs, which pull the cord tight.
I got these parts from Gilberto Cerna at Century Mallet Service in Chicago: Paracord for bars, 4 Tension springs, 180 Felt washers
The vibes on a sunny fall day, about to be returned to their owner!
Special thanks:
Kurt Wagner, for his effort and can-do attitude
Gilberto Cerna, for his knowledge and resourcefulness
Bill French, for the opportunity, trust, and PATIENCE!
https://www.coepercussion.com/, for the wisdom on mallet instrument physics
Bart Hopkin for his book Making Musical Instruments